


Many camcorders are able to record videos in AVCHD format. If you are using camcorder like Canon, Panasonic, or JVC, you must have recorded some interesting and stylish AVCHD files. Have you had the need or thought that want to extract soundtrack from AVCHD and save it as MP3 format for special use, saying, for example, making a special gift for your family members.
Anyway, no matter for what reason, if you need to extract MP3 from AVCHD now or later, you can keep this site. We are going to give you the guidance on how to convert AVCHD to MP3 with the Audio Converter.
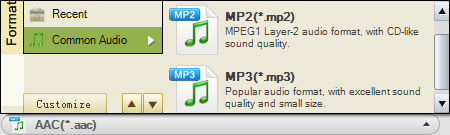
Audio Converter is a professional tool specialized in extract audio track from any video file formats like AVCHD, MOV, MP4, MKV, AVI, MPEG etc and save them in optional audio formats including MP3, AAC, AC3, AIFF, FLAC etc. So, if your videos are camcorder formats like MTS, M2TS, etc, it is fine with the tool. What’s more, it is competent to make the conversion between various audio file formats, such as AC3 to MP3, AIFF to MP3, FLAC to MP3, MP3 to AAC etc.
Generally, it is suggested to choose the MP3 as output format because of its wide compatibility with most devices like Car radio’s, DVD players, iPad, iPhone, HTC One, Sony Xperia, Samsung Galaxy S4 etc.
Anyway, then how to use the tool to extract audio soundtrack, saying, convert AVCHD to MP3? Let’s take a good look at the following steps.


Step 1 Load AVCHD files to the program
Click the “Add File” button to load AVCHD files to the Audio Converter. Thanks to the batch conversion mode, you are able to load a bunch of AVCHD files to the program at one time for saving from trouble.
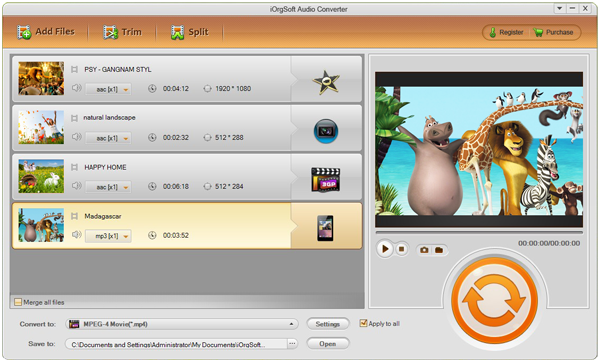
Step 2 Select an appropriate output format
After successfully loading files to the software, you need to choose proper output format for each imported file. If you aim to save all files in the same audio format, then you can click the “Apply to all”. To select output format, you can click the “Convert to” pull-up list to get the format list.
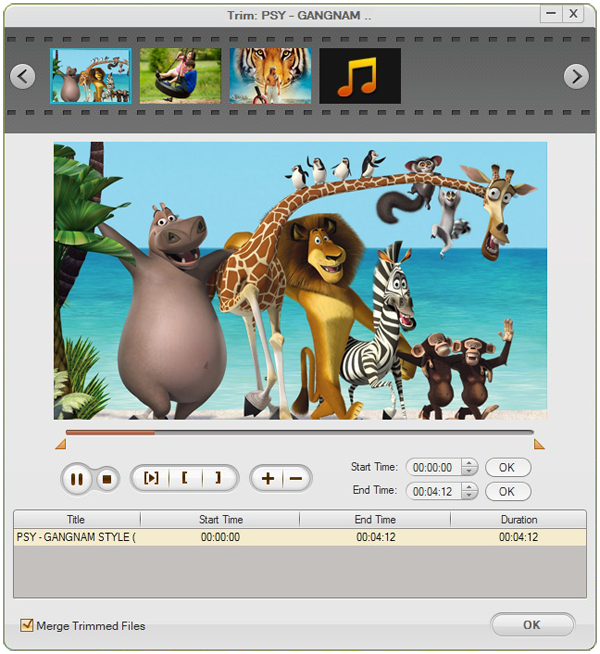
Step 3 Setting and trimming
Setting: You can click the button “Settings” beside the “Convert to” to change the output parameters like sample rate, bit rate, and channel.

Trimming: Click “Trim” button to get one or several particular segments converted. You can drag the triangle button to get the certain time-length segment or you can directly input value to the start and end time blank to make it. To get the precise time value more easily, you’d better first drag the triangle to get the approximate value and then input the accurate value to the blank.
Step 5 Conversion starts
After everything gets ready, you can just press the round and orange button to get the conversion start.
