Many people like to download videos from YouTube because it can often provide interesting and latest video and audio as fast as it can, clinging to the fashion pulse. You might have encountered the situation that want to use the music of the YouTube video as the ring tone for mobile phone or as the music background for a project etc, but you don’t know how to make it personal to your mobile phone or other devices and apps. Since most of the YouTube videos are in FLV format, you might as well convert FLV to MP3 which is a widespread audio format supported by almost all devices.
To extract the music or sound from YouTube FLV video, you have to use the converting app of course. FLV to MP3 Converter has the ability to make this for you with ease. This MP3 Converter is a great app to professionally convert YouTube to MP3 without damage the original sound quality. It is an easy-to-use app that even you are a novice you can handle it quickly. Within a few mouse clicks, you can then finish the conversion and import converted YouTube MP3 to your mobile phone to make it the ring tone.
What is worth mentioning is that the Audio Converter (or Audio Converter for Mac) is such a all-in-one tool that it is able to convert audio file among the common audio formats like MP3, WMA, M4A, MP2, AAC, AC3 etc and extract audio files from any video file except FLV. In addition, you can trim audio to get your favorite clip by setting start and end time. Besides, it allows you to make audio modifications, for instance, adjust audio sample rate, channel and bit rate.
How to convert FLV to MP3 then? You can free download the trial version to try it following below steps.


Step1. Load FLV files
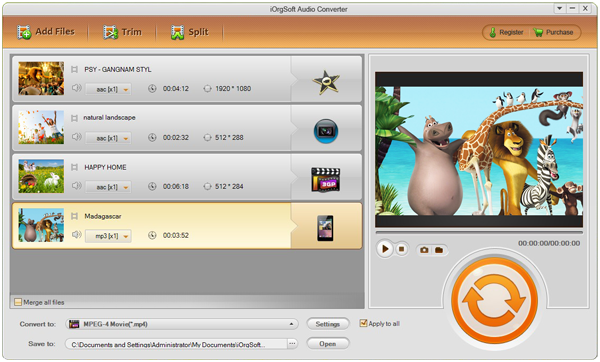
After launch the program, you can click the button “Add File” to load local FLV files to the program. You can feel free to load as many as you like to thanks to the batch conversion mode within the program.
Step2. Select MP3 as output format
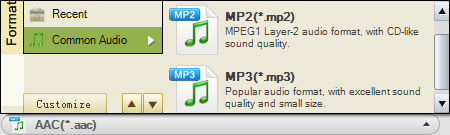
When finishing loading files, you should go to the “Convert to” pull-up list to find the list of output format. Choose the MP3 as output format. Or you can choose by clicking the video format icon next to the imported files. And then, you can go to the “Save to” option to change the default output path if necessary
Step3. Settings
For your option, you can adjust the output parameters at the settings option. Click the “Settings” button next to the “Convert to” option, and you can choose audio sample rate, bi rate, and channels. Click “OK” when finished.

Step4. Start conversion
Finally, when you feel ready, just click the round and orange start icon to get the program do the conversion automatically. After it is done, you can then make good use of the converted audio files.

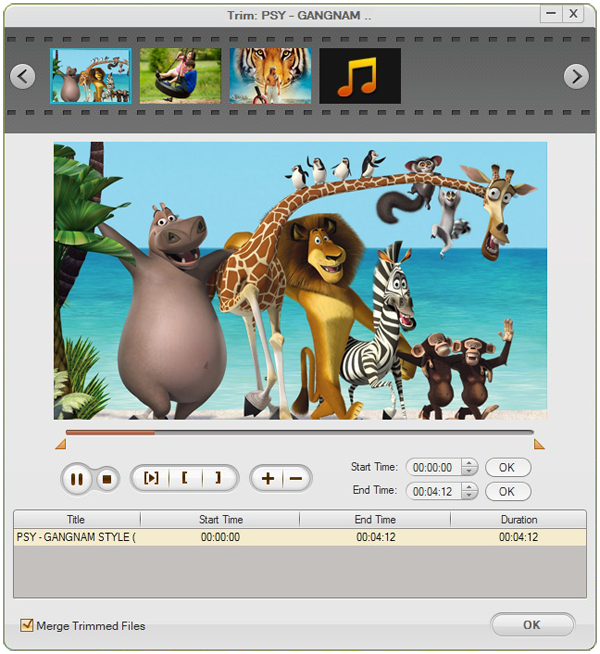
Tip: If you want to convert a certain time-length audio, you can click “Trim” to trim your file by giving it a start and end time. You are able to make several segments by setting different start and end time.